You have approved the design. The materials have been selected. Somewhere in a factory, CNC machines are cutting panels to the exact millimetre for your kitchen, wardrobe, or office setup. But what happens next? How does a stack of factory-finished modules become a fully functioning interior inside your home?
That is what most people do not understand about modular furniture installation. It is not a simple delivery and drop-off. It is a structured process that involves coordination between the manufacturing team, logistics, and on-site installers. When done correctly, the result is a seamless fit that looks like it was always part of the room. When done poorly, even the best factory-made modules can end up with misaligned doors, uneven gaps, and hardware that does not function properly.
This guide walks you through every stage of the modular furniture installation process, from the moment your modules leave the factory floor to the final quality walkthrough inside your home. Whether you are getting a modular kitchen fitted, wardrobes assembled, or an office space set up, the process follows the same disciplined sequence.
Before Installation: What Needs to Be Ready at Your End
Professional modular furniture assembly does not start on the day the modules arrive. There is a preparation phase that you, as the homeowner or project owner, need to complete before the installation team shows up.
The room where modules will be installed should be empty and clean. For kitchens, this means the countertop area should be cleared, plumbing rough-ins completed, and electrical points wired to the approved positions. For wardrobes, the wall surface should be plastered, painted, and dry. For offices, flooring should be finished and power outlets installed at designated locations.
Your modular furniture manufacturer should share a pre-installation checklist specific to your project. This typically covers wall readiness, electrical point positions, plumbing line placement, and access clearance for transporting modules through corridors and staircases. Ignoring this checklist is the single most common reason installations get delayed.
Step 1: Factory Quality Inspection and Packing
Before a single module leaves the factory, it goes through a final quality inspection. Every panel is checked for dimensional accuracy against the approved design file. Edge banding is inspected for adhesion. Pre-drilled holes are verified for correct positioning. Hardware components like hinges and channels are tested for smooth operation.
After clearing inspection, modules are packed individually with protective wrapping. Flat-packed modules are bundled with hardware tagged and labelled. Countertops are packed separately with extra padding. This care during packing directly impacts the condition in which your furniture arrives on-site.
Step 2: Logistics and Delivery Coordination
Delivery is not just about loading modules onto a truck. A responsible manufacturer coordinates the delivery schedule with your availability and site readiness. This includes confirming building access permissions, lift availability for high-rise apartments, and staircase clearance for walk-up buildings.
Modules are loaded in reverse installation sequence so that pieces needed first come out last. This prevents unnecessary handling on-site and reduces damage risk. For pan-India deliveries, transit times vary by distance, but packing standards remain consistent regardless of destination.
Step 3: On-Site Unpacking and Module Verification
Once the modules arrive, the installation team begins with a systematic unpacking. Each module is cross-checked against the packing list and the approved design drawing. This verification step catches any transit damage or missing components before assembly starts.
Modules are then laid out in the room according to their installation sequence. For a modular kitchen installation, this means base cabinets are positioned first, followed by wall cabinets, then tall units. For wardrobe installation, the carcass panels are sorted by position. For office workstations, desks and partition components are grouped by cluster.
Step 4: Wall Marking and Levelling
This step most people do not see, but it determines the entire outcome. Before a single screw goes into the wall, the installation team marks exact mounting positions using laser levels. Wall cabinets need perfectly horizontal reference lines. Base cabinets need levelling adjustments to account for uneven flooring, which is common in Indian construction.
For kitchens, an uneven base cabinet causes countertop joints to misalign, doors to hang unevenly, and drawers to slide open on their own. For tall wardrobes, even a 2mm lean becomes visible at the top. Experienced teams spend 30 to 60 minutes on marking and levelling before touching any modules. Rushing this step is where amateur installations fail.
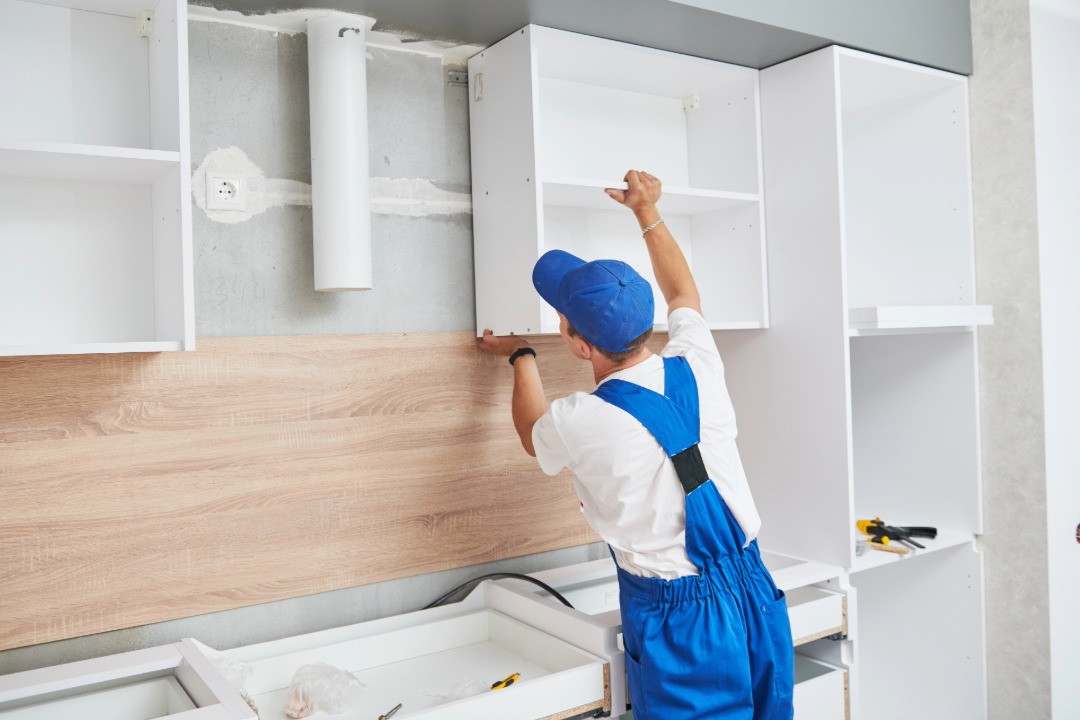
Step 5: Module Assembly and Mounting
Now the visible work begins. Base cabinets are placed first and levelled using adjustable legs. They are connected to each other using inter-cabinet connectors to form a rigid structure. Wall brackets are drilled at marked positions, and wall cabinets are lifted and secured onto these brackets.
For wardrobes, the carcass panels are assembled on the floor, then tilted upright and fixed to the wall. Internal components like shelves, hanging rods, drawers, and pull-out trays are fitted after the main structure is secured. For office interior projects, modular workstation panels and desk frames are bolted together in clusters, with cable management channels integrated during assembly rather than added as an afterthought.
Each connection point uses the hardware specified in the design. Soft-close hinges are calibrated for the specific door weight. Telescopic drawer channels are adjusted for smooth, full-extension operation. This is where professional furniture installation differs from DIY or carpenter-led assembly. The hardware is not just attached. It is tuned.
Step 6: Countertop and Fixture Integration (For Kitchens)
For modular kitchen projects, this step involves fitting the countertop slab, cutting sink openings, and coordinating with plumbers for water line connections. Granite and quartz countertops are heavy and require precise placement. Joints between slabs must be sealed properly to prevent water seepage into the cabinets below.
Backsplash tiles or panels are aligned after the countertop is set. Chimney ducting, hob connections, and appliance fitting happen in parallel. The installation team coordinates with electricians and plumbers to ensure that every utility line meets the module at the correct point. This cross-trade coordination is why modular kitchen installation requires a trained crew rather than a general handyman.
Step 7: Hardware Calibration and Fine-Tuning
Once all modules are mounted and fixtures integrated, the installation team goes through every door, drawer, and mechanism in the project. Soft-close hinges are adjusted using the three-axis screws that control height, depth, and lateral alignment. Drawer channels are tested for smooth opening and closing at full extension. Sliding wardrobe doors are aligned on their tracks to prevent rubbing or sticking.
This calibration pass is what gives factory-made modular furniture its signature feel. Doors close silently. Drawers glide without resistance. Pull-out units retract on their own. These details come from proper hardware calibration, not from the hardware itself. The same Hettich or Blum hinge will perform differently depending on how precisely it was adjusted. Learn more about the professional installation process and after-sales support that ensures long-term performance.
Step 8: Cleanup and Final Quality Walkthrough
Professional teams do not leave a site until it is clean. Packing material, protective films, dust, and debris are cleared. Surfaces are wiped down. The space should look ready to use, not like a construction zone.
The final step is a quality walkthrough with you. The team opens every door, pulls every drawer, tests every mechanism, and explains care instructions for different surfaces. They also explain how to reach the service team if anything needs attention later. This handover is not a formality. It is where installation ends and daily use begins.
How Long Does Modular Furniture Installation Take?
The installation timeline for modular furniture depends on scope. An L-shaped kitchen takes two to three days on-site. A U-shaped or island layout with appliance integration takes four to five days. A single wardrobe installs in one to two days. A full home interior project covering kitchen, bedrooms, and living room may need seven to twelve days.
For offices, modular office workstation installation for 20 to 40 desks can often be completed over a single weekend. Compare this with traditional carpentry, where the same kitchen takes 30 to 45 days. That is not just time saved. It is weeks of disruption eliminated. Explore more about space planning tips for modern homes to make the most of your newly installed interiors.
Common Mistakes That Derail Modular Furniture Installation
Even with factory-made precision, installations go wrong when basics are ignored.
Incomplete site preparation is the top issue. If walls are not ready or electrical points are in the wrong position, the installation team cannot proceed. Hiring untrained installers is the second. Some companies manufacture well but outsource installation to local labour who lack experience with modular hardware. A soft-close hinge that is not calibrated correctly will start slamming within months.
Skipping the final walkthrough is the third. If you do not test every mechanism before signing off, post-installation corrections become service calls that take longer to resolve. Spend 30 minutes during handover checking everything. It saves weeks of follow-up.
Frequently Asked Questions
How long does modular kitchen installation take from delivery to handover?
An L-shaped modular kitchen with standard cabinetry, countertop, and backsplash typically takes two to three days of on-site installation. U-shaped or island kitchens with built-in appliances, chimney ducting, and dishwasher integration may take four to five days. This timeline covers module placement, countertop fitting, plumbing coordination, hardware calibration, and the final quality walkthrough. Factory manufacturing happens before this phase and usually takes 25 to 45 days from design approval.
Do I need to prepare my home before the modular furniture installation team arrives?
Yes. Site preparation is essential for a smooth installation. The room should be empty, walls painted and dry, flooring completed, and electrical and plumbing points installed at the positions specified in the approved design. Your manufacturer should provide a detailed pre-installation checklist. Completing this checklist before the team arrives prevents delays and avoids costly on-site modifications that can push back your project timeline.
Can modular furniture be installed in high-rise apartments with narrow lifts and corridors?
Yes. Factory-made modular furniture is designed with transportability in mind. Modules are sized to fit through standard doorways and can be carried through staircases when lifts are too small. Flat-packed components are even easier to transport. The delivery team assesses access routes in advance, especially for high-rise buildings in cities like Hyderabad, Bangalore, and Mumbai. Any access constraints are flagged during the planning stage so that module dimensions can be adjusted if necessary.
What happens if something gets damaged during installation or does not fit correctly?
A genuine modular furniture manufacturer with their own factory setup will take responsibility for any damage or misfit. If a panel is scratched during transit or a module does not align due to a production error, the manufacturer replaces or corrects it at no additional cost. This accountability is one of the core reasons to choose a company that handles manufacturing and installation in-house rather than outsourcing to third parties.
Is professional installation included in the cost, or is it charged separately?
This varies by company. Reputable manufacturers include installation charges in their itemized quotation. You should see a clear line item for installation alongside material, hardware, and delivery costs. If a company quotes only for materials and asks you to arrange installation separately, that is a sign they do not control the installation quality. Always choose a manufacturer that offers end-to-end service, from design to professional installation and after-sales support.
Getting the Installation Right Matters More Than You Think
A beautifully designed modular kitchen means nothing if the countertop joints leak water into the cabinets below. A premium wardrobe loses its appeal if the sliding doors rub against each other every time you open them. The gap between a good modular product and a great installed interior comes down to one thing: the quality of the installation process.
From factory inspection to on-site levelling, from hardware calibration to the final walkthrough, every step in the furniture installation process directly affects how your interiors look, feel, and function for years to come. Choose a manufacturer like Holzbox that owns the entire chain, from factory floor to your living room floor, and you eliminate the gaps where quality drops.Start with a consultation. Get your space optimised with modular planning. And when installation day arrives, you will know exactly what to expect at every step.