
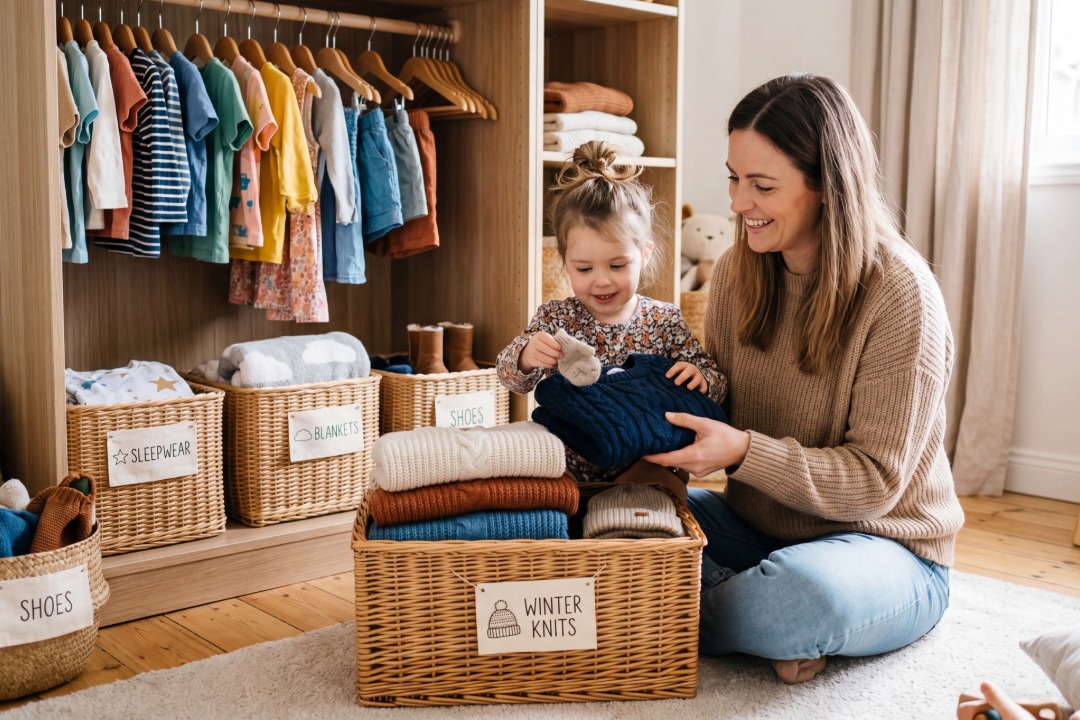
A kids’ wardrobe is not a smaller version of an adult wardrobe. The clothes are shorter, the shoes multiply faster than expected, the toys creep in from every corner, and the whole system has to keep working as the child moves from crawling to primary school to teenage years. Most wardrobes fail here because they are planned once and never revisited. A modular wardrobe solves this by treating the interior as a set of adjustable parts rather than a fixed cabinet.
This guide walks through every decision that goes into planning one, from the first measurement to the final handle choice. If you are building or renovating a children’s room, use it as a checklist before you sign off on any design.
Why a Modular Wardrobe Suits a Kids’ Room Better Than a Fixed One
A child at four needs a lot of open shelves for toys, low hooks for jackets, and very little hanging space. The same child at ten needs proper hanging for school uniforms, drawers for folded tees, and a shoe rack that fits sports gear. At fourteen, the shoe collection doubles again and the hanging section becomes the busiest zone.
A fixed wardrobe forces you to pick one of these stages and live with it. A modular wardrobe uses adjustable shelves, removable dividers, and interchangeable hanging rods, so the internal layout can shift without any carpentry. You reposition a shelf pin, swap a drawer for an open cubby, or slide the hanging rod down by six inches. The carcass stays. The interior changes with the child.
There is a second reason modular works better for kids’ rooms. Factory built modular units are assembled from independent boxes that can be disassembled, moved, and reinstalled if you shift homes or reorganise the room. That flexibility matters more in a growing family than in any other space in the house.
Step 1: Measure the Room Before You Draw the Wardrobe
Every wardrobe plan starts with the room, not the wardrobe. Note the following before you look at any design:
- Full floor to ceiling height, measured at three points along the wardrobe wall
- Wall length available, minus any door swings, window ledges, or AC ducts
- Distance from the wardrobe wall to the bed and to the door of the room
- Position of switches, sockets, and any exposed conduit
- Skirting height and any beam or false ceiling that drops down
The two mistakes that show up most often are ignoring the ceiling drop above the wardrobe and forgetting the swing radius of the room’s door. A wardrobe that clears the ceiling by only two inches looks cramped and makes the room feel low. A hinged door that opens straight into a bed frame becomes a daily irritation.
Once the numbers are on paper, decide whether the wardrobe will be a single wall unit, an L shape wrapping into a corner, or a full length built in system. In small rooms, a floor to ceiling unit along one wall almost always works better than a shorter freestanding one because it uses the full vertical volume of the room. For deeper thinking on small room layouts, our guide on kids room interior design ideas for small spaces is a useful companion read.
Step 2: Choose Between Hinged and Sliding Shutters
The shutter decision affects everything else: internal depth, access, cost, and how much clear floor space you keep in the room.
Hinged shutters open the wardrobe fully in one motion. Every shelf and drawer is visible at once, which suits younger children who are still learning where things belong. Hinged doors need clear swing space in front of the wardrobe, usually between 550 mm and 700 mm depending on shutter width. If the bed sits close to the wardrobe wall, hinged doors will hit the mattress.
Sliding shutters need no swing space, so they work well in narrow rooms and rooms where the bed sits across from the wardrobe. The trade off is access. Only one half of the wardrobe is open at a time, which means internal planning has to be tighter. Frequently used items go in the front half of each zone, and seasonal items go to the back.
A useful rule for a kids’ room: if the child is under seven and the room has enough circulation space, hinged shutters are easier to live with. From seven upwards, or in a compact room, sliding shutters are the safer choice. Holzbox builds both formats as part of the modular wardrobe and storage solutions range, and the internal fittings are the same across shutter types.
Step 3: Plan the Internal Zones
This is where most kids’ wardrobes fail. The interior gets designed as one open box with a single hanging rod and two shelves, which is fine for six months and useless after that. A good internal plan divides the wardrobe into zones, each sized for a specific use.
Hanging Zone
For a child under eight, one short hanging section is enough. Set the rod at a height the child can reach on their own, typically 900 mm to 1100 mm from the floor. This encourages independence and cuts down the number of times you get called in to hand over a shirt. Above the short hanging rod, use adjustable shelves for folded clothes, bedding, or storage boxes.
For an older child, plan a longer hanging section of about 1400 mm to accommodate school uniforms, occasion wear, and jackets. If the child shares the wardrobe with a sibling, split the hanging zone vertically with a partition so each child has a defined space.
Drawers
Drawers hold what shelves cannot: innerwear, socks, sports accessories, small items that would otherwise pile up. Place drawers at the bottom of the wardrobe so a young child can pull them open without climbing. Two shallow drawers are more useful than one deep drawer because they separate categories. Soft close channels are worth the small extra cost. A slamming drawer catches fingers, and a child does not have the reflex of an adult to pull back in time.
Open Shelves and Cubbies
Open shelves suit toys, books, school bags, and items that are picked up and put back many times a day. If everything has to go behind a door, the child stops putting things away. Reserve one column of the wardrobe for open storage, ideally at the child’s shoulder height. Fabric bins or labelled baskets inside these cubbies turn the shelves into a simple sorting system.
Accessories and Extras
Plan for the things that always end up on the floor: school shoes, sports shoes, backpacks, art supplies. A pull out shoe rack near the bottom, hooks on the inside of a shutter for the school bag, and a shallow tray drawer for stationery cover most of these. If the child is old enough for a study routine, a small pull out desk built into the wardrobe carcass can double as a homework surface without adding any floor footprint.
Step 4: Choose Materials That Handle Real Use
A kids’ wardrobe takes more abuse than any other cabinet in the house. Sticky fingers, dropped water bottles, scratches from toys, and the occasional crayon episode are all normal. The material choice has to match that reality.
For the carcass, BWP grade plywood or HDHMR board is the sensible base. Both resist moisture better than particle board and hold screws well over years of drawer and shutter use. Avoid low grade MDF for anything structural in a kids’ wardrobe. It sags at the shelf midpoint under the weight of stacked clothes and loosens at hinge points within two or three years.
For the shutter finish, three options work well:
- Laminate is the most practical. It resists scratches, wipes clean with a damp cloth, and comes in a wide range of solid colours and patterns. For a kids’ wardrobe, matte or textured laminates hide fingerprints better than high gloss.
- PU coating gives a smoother, richer finish and can be repainted later if the child outgrows the colour. It costs more and needs gentler cleaning.
- Membrane shutters allow curved edges and moulded profiles, which suits themed rooms. They are less scratch resistant than laminate but softer to the touch.
Whatever the finish, insist on sealed edge banding on every panel edge. Exposed edges peel, absorb moisture, and become the first sign that a wardrobe is aging badly.
Step 5: Build in Flexibility for the Next Ten Years
The best kids’ wardrobes are planned for at least three life stages: early childhood, primary school, and teenage. You do not build three wardrobes. You build one carcass with enough adjustment points to become three different interiors over time.
Ask for these adjustment features when the wardrobe is being manufactured:
- Shelf pin holes drilled at 32 mm intervals along the full height of every vertical partition, so shelves can move up or down as needs change
- Removable hanging rods that can be repositioned or taken out entirely to convert a hanging zone into a shelved one
- Interchangeable drawer boxes that can be swapped for open shelves and back again
- Neutral shutter colours as the base, with any playful elements added through removable decals, magnetic panels, or a single accent shutter that can be replaced later
This approach avoids the trap of a themed wardrobe that looks charming at age five and embarrassing at age twelve. Keep the permanent elements calm and the temporary elements bold.
Step 6: Add Safety Features That Actually Matter
Kids’ furniture safety is often reduced to a marketing line about rounded edges. The real safety list is longer and more specific.
- Rounded edge profiles on every exposed vertical edge and countertop, not just the corners
- Soft close hinges and drawer channels on every moving part, to prevent finger injuries from slammed shutters and drawers
- Anti tip brackets fixing the wardrobe to the wall at the top. A tall wardrobe is a climbing target for a curious child, and the tipping risk is real
- Low VOC finishes on shutters, laminates, and adhesives. Children spend more hours in their bedrooms than adults do, and the air quality inside the wardrobe matters
- Concealed hinges and recessed handles to remove protruding hardware at head height
- Safety locks on any drawer or shelf that stores small items, medicines, or cleaning supplies
These features add a small percentage to the total cost of the wardrobe and remove a large percentage of the everyday risk.
Step 7: Colour, Handles, and Personality
Once the structural decisions are settled, the finish decisions become simpler. Two principles help.
First, keep the base neutral. White, cream, light oak, and soft grey all age well and let bedding, wall art, and accessories carry the theme. A wardrobe is the largest object in the room. If it commits to a theme, the whole room commits with it.
Second, add personality through one deliberate element. A single accent shutter in a bold colour, a run of playful handles across the drawer front, or a chalkboard panel on the inside of a shutter all add character without dominating the room. Any of these can be swapped later at low cost.
For shared rooms with two children, use the same base finish across both wardrobes and let each child pick their own accent element. This keeps the room visually coherent while giving each child a sense of ownership.
Common Mistakes to Avoid
- Designing for the current age only. A toddler wardrobe with no hanging space is unusable in two years.
- Placing frequently used items too high. If the child cannot reach a shelf, that shelf becomes a parent’s shelf.
- Skipping the anti tip fitting. The wall fixing takes ten minutes and prevents a serious accident.
- Over decorating the wardrobe. Themed shutters, cartoon prints, and heavy graphics look dated within three or four years.
- Choosing depth blindly. A standard 600 mm wardrobe depth suits hanging clothes. In a very small room, a 450 mm shallow wardrobe with only shelves and short hanging can save valuable floor space.
- Ignoring lighting inside the wardrobe. A low wattage LED strip along the top of the hanging zone makes early morning school routines easier and prevents the child from digging through dark shelves.
Bringing It Together
A well planned modular wardrobe for a kids’ bedroom is not about picking the prettiest shutter or the trendiest handle. It is about matching a set of internal decisions to the child in front of you, and then leaving enough flexibility for that child to grow. Get the measurements right, choose the shutter type that fits the room, plan the internal zones for the child’s actual age, use materials that survive daily life, and build in the adjustment points that let the wardrobe evolve over the next decade.
Holzbox designs and manufactures modular wardrobes with these principles built in, from CNC cut carcasses and soft close hardware to low VOC finishes and full factory quality control. If you are ready to plan a kids’ wardrobe for your home, explore the Holzbox wardrobes and storage solutions range, or read more about our factory first approach to modular interiors.
Frequently Asked Questions
What is the ideal size of a modular wardrobe for a kids’ bedroom?
A single child usually needs about 1500 mm to 1800 mm of wardrobe width, at full floor to ceiling height, and 600 mm depth. In smaller rooms, a 450 mm shallow depth with shelves and short hanging can be enough up to age eight or nine.
Hinged or sliding shutters for a kids’ wardrobe?
Hinged shutters give full access and suit younger children. Sliding shutters save circulation space and suit narrow rooms or rooms where the bed sits close to the wardrobe wall.
What is the best material for a kids’ modular wardrobe?
BWP plywood or HDHMR board for the carcass, with laminate or PU finish on the shutters. Both resist moisture, hold hardware well, and last through years of daily use.
How do I make the wardrobe grow with my child?
Ask for shelf pin holes at 32 mm intervals, removable hanging rods, and interchangeable drawer and shelf modules. Keep the shutter finish neutral and add personality through elements that can be swapped later.
Can a modular wardrobe be moved to a new home?
Yes. Factory built modular wardrobes are assembled from independent boxes that can be disassembled, transported, and reinstalled in a new room. Minor adjustments may be needed if the new wall dimensions differ.
What safety features should a kids’ wardrobe include?
Rounded edges, soft close hinges and drawer channels, anti tip wall brackets, low VOC finishes, recessed or concealed hardware, and safety locks on drawers that store small items.